
Direct Answer
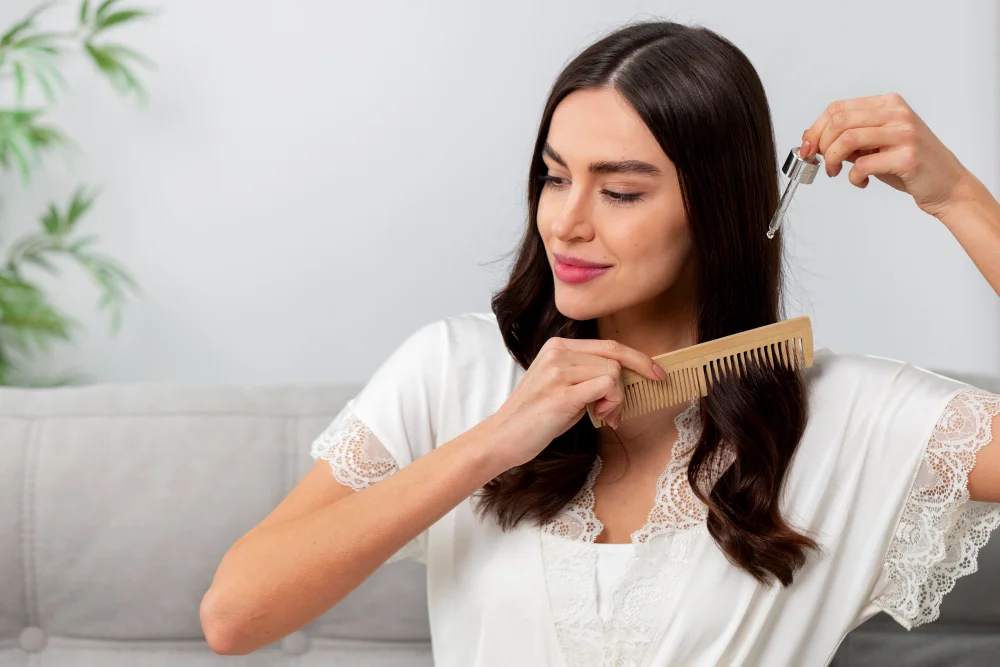
Use 1-3 drops of lightweight oil, apply to damp hair from mid-lengths to ends only (never scalp roots), and distribute by warming between your palms first. This technique prevents the greasy look while delivering nourishment. Pro stylists swear by the “less is more” principle—start with half a pump, build up if needed, and always focus on where your hair actually needs it.
The “Less Is More” Principle
This is the single most important rule to master: most people use far too much oil.
Professional stylists like David Lopez confirm what dermatologists have known for years: even half a pump of oil is usually sufficient for shoulder-length hair. Yet most people grab a quarter-sized glob, pour it straight onto their scalp, and wonder why they wake up looking like they haven’t showered in days.
Here’s the math: oil is concentrated. One small drop covers approximately 2-3 inches of hair. If you have shoulder-length hair, 2-4 drops spread through the mid-lengths and ends is genuinely all you need.
The visual test: If your hands feel slick after applying oil to your hair, you’ve used too much. Your hands should feel slightly moisturized, not like you’ve plunged them into a fryer.
Complete the Picture, read: Best Products for Oily Scalp and Dry Ends
Step-by-Step Professional Application Method
Step 1: Warm the Oil in Your Hands
This is something most people skip, but professional stylists always do it.
- Pour 1-3 drops of oil into your palm (start small)
- Rub your hands together in circular motions for 5-10 seconds
- This warms the oil, makes it less viscous, and helps it distribute evenly
Why this matters: Cold oil is thicker and clumps. Warmed oil flows smoothly and distributes without leaving visible spots of greasiness.
Step 2: Apply to Damp Hair Only
The optimal time to apply oil is when your hair is:
- Still damp from the shower (not soaking wet, not dry)
- Towel-blotted with a microfiber towel or soft t-shirt
- Free of product buildup
Applying oil to soaking wet hair dilutes the oil. Applying to completely dry hair means the oil sits on top rather than being absorbed.
Step 3: Start at the Ends, Work Your Way Up
This is where most people get it wrong. They apply oil directly to their scalp or crown, which immediately makes everything look greasy.
The correct approach:
- Divide your hair into 3-4 sections (helpful for managing and distributing evenly)
- Start at the bottom ends of each section
- Use your fingertips to gently distribute the warmed oil upward
- Work up to the mid-lengths
- Never apply directly to the scalp or roots
- If you have frizz at the crown, use whatever oil is left on your hands—not fresh oil
This method ensures that even with a small amount of oil, you cover your entire length without overloading any section.
Keep Exploring → Best Natural Moisturizer for Natural Hair and How to Air Dry Hair Without Frizz
Step 4: Comb Through with Your Fingers
Don’t use a brush after applying oil to wet hair—that can cause breakage. Instead:
- Use your fingers or a wide-tooth comb to comb through the oiled sections
- This distributes the oil evenly and removes any clumps
- Your hair should look shinier, not slicked down or wet
If you see visible glossiness dripping down your hair, you’ve applied too much. The goal is subtle shine, not obvious slickness.
Choosing the Right Oil for Your Hair Type
Not all oils are created equal, and the wrong choice can make even a small amount look greasy.
For Fine or Thin Hair
Best oils: Argan, jojoba, grapeseed, rosemary
Avoid: Coconut, avocado, olive (too heavy)
Fine hair benefits from lightweight, fast-absorbing oils that won’t weigh strands down. Argan oil is the gold standard here—it absorbs quickly without leaving residue.
Pro tip: If you have fine hair, consider using an oil mist instead of liquid oil. Mists atomize the oil, so you’re applying a lighter coating.
For Thick or Coarse Hair
Best oils: Coconut, castor, avocado, olive
Also good: Almond, sesame
Thick hair can handle—and often needs—heavier oils to smooth the cuticle and reduce frizz. You can use slightly more oil here because the thickness absorbs it without looking greasy.
For South Asian women with naturally thick or textured hair, coconut oil and sesame oil are ideal because they’re heavy enough to provide lasting conditioning. However, the application method still matters. Use 3-4 drops instead of 1-2, but still apply to damp hair and focus on mid-lengths to ends.
For Curly or Coily Hair
Best oils: Jojoba, argan, sweet almond, coconut (for coils)
Curly and coily hair needs oils that seal moisture without weighing down curl definition. Apply oil with a “praying hands” method (hands together, smoothing down curls) rather than rubbing it in, to preserve your curl pattern.
The Application Timing: When to Apply Oil
Option 1: On Damp Hair, Daily Maintenance (Best for Most People)
- Shower in the evening
- Apply oil to damp hair before styling
- Blow-dry your hair (if heat styling)
- Or air-dry
Benefit: Oil acts as a heat protectant. It seals moisture in before you style. Hair looks polished without the greasy-the-next-day problem.
Want smoother hair without heat? Try How to Make Hair Look Polished Without Heat
Option 2: Pre-Shampoo Treatment (Best for Very Dry Hair)
- Apply oil to damp hair 1-2 hours before shampooing
- Tie hair up in a loose bun or braid
- Wash with sulfate-free shampoo and lukewarm water
Benefit: Oil gives your hair protection during the washing process, which is when hair is most fragile. This deep conditioning approach prevents moisture loss during cleansing.
Option 3: Overnight Treatment (Best for Weekly Deep Conditioning)
- Apply 3-4 drops of oil to mid-lengths and ends
- Tie hair in a loose braid or bun (use silk scrunchie to avoid breakage)
- Sleep with oil in
- Wash thoroughly the next morning
Benefit: Extended time allows deeper penetration. But be cautious—leaving oil in for 24+ hours can cause buildup. Wash thoroughly.
Avoid: Don’t leave oil in overnight more than once weekly, and always wash it out completely the next morning.
The LOC Method: Layering for Maximum Effect
Professional stylists often use the LOC method (Liquid-Oil-Cream) for maximum hydration without greasiness:
- L (Liquid): Apply a water-based leave-in conditioner to damp hair
- O (Oil): Apply a small amount of oil over the conditioner
- C (Cream): Seal with a lightweight styling cream or curl cream
This layering approach gives you:
- Hydration from the water-based product
- Sealing from the oil
- Hold and definition from the cream
The key is that you’re spreading the responsibility—no single product has to do everything, so you use less of each one and achieve better results without greasiness.
For Oily Scalps: Can You Use Oil Safely?
Here’s the counterintuitive truth: even people with naturally oily scalps can benefit from oil—if applied correctly.
Your scalp’s oiliness isn’t necessarily a sign you should avoid all oils. It often means:
- Your scalp is over-producing sebum to compensate for a stripped-away moisture barrier
- You’re overwashing, which strips natural oils
- You’re using harsh shampoos that disrupt scalp pH
If you have an oily scalp:
- Switch to a gentler, sulfate-free shampoo
- Reduce shampooing to 2-3 times weekly
- Apply oil ONLY to mid-lengths and ends, never the scalp or roots
- Use lightweight oils like jojoba or argan, not heavy ones
- Consider how to maintain a haircare routine specifically for oily scalp and dry ends, which addresses this exact combination
When you stop over-stripping your scalp, it naturally regulates sebum production, and strategic oil application becomes a non-issue.
The Science: Why Less Oil Looks Better
Here’s what’s happening at the microscopic level:
When you use too much oil:
- Excess oil coats multiple hair strands together, making them clump
- Clumped strands catch light differently, looking greasy and weighed down
- The oil residue on your scalp and around your roots becomes visible
When you use the right amount:
- Oil coats individual strands evenly
- Each strand reflects light, creating shine
- The coating is thin enough to be invisible
Think of oil like a very thin lacquer. One coat looks polished. Three coats looks plasticky. It’s the same with hair.
How to Remove Oil From Hair (The Right Way)
If you’ve over-oiled, don’t panic. Here’s how to fix it:
Same-Day Fix (If You Just Applied Too Much)
- Don’t wash immediately (shocking, but true)
- Sprinkle a small amount of baby powder or dry shampoo on oily sections
- Wait 5 minutes for it to absorb the excess
- Brush through gently with a soft brush
- This removes visible greasiness without stripping your hair
Proper Wash-Out
- Don’t use hot water (opens the cuticle and spreads oil around)
- Use lukewarm water
- Apply shampoo directly to oily sections first, lather gently
- Rinse thoroughly with cool water
- Apply conditioner to mid-lengths and ends only
Most people make the mistake of using hot water to remove oil, which actually makes things worse because it opens the hair cuticle and spreads the oil throughout your hair.
Oil Myths vs. Reality
Myth: “Oil will make my hair grow faster.”
Reality: Oil doesn’t directly stimulate growth, but it protects hair from damage, allowing existing growth to be retained rather than breaking off. So you’ll see more length.
Myth: “I should apply oil every day.”
Reality: For most hair types, 1-3 times weekly is optimal. Daily application causes buildup. An exception: very coarse, curly hair might tolerate daily light application.
Myth: “Heavy oils are always bad.”
Reality: Heavy oils are bad for fine hair. For thick, coarse, or curly hair, heavy oils are perfect. Match the oil weight to your hair density.
Myth: “All natural oils are better than commercial hair oils.”
Reality: Commercial hair oils formulated for hair are better than pantry oils, which can be too heavy or unstable. Pure coconut oil on fine hair is worse than a lightweight commercial hair oil blend.
Keep Improving, read: Sea Salt Spray for Hair: What It Does and When to Avoid It
Common Application Mistakes
❌ Mistake: Applying oil with wet hands directly to scalp
✓ Fix: Warm oil in your palms first, then apply to damp hair mid-lengths only
❌ Mistake: Using the same amount of oil regardless of hair length
✓ Fix: 1-2 drops for short hair, 2-3 drops for medium, 3-5 drops for long
❌ Mistake: Leaving oil in for 24+ hours expecting better results
✓ Fix: 1-2 hours is sufficient; longer causes buildup
❌ Mistake: Applying oil immediately before bed with loose hair
✓ Fix: If applying oil before bed, tie hair up in a loose protective style
❌ Mistake: Using the same oil formula year-round
✓ Fix: Switch to lighter oils in summer, heavier oils in winter or dry seasons
The Professional Stylist’s Secret
Celebrity stylists and salon professionals use oil all the time—but you never see them looking greasy. Here’s why:
- They use tiny amounts (half a pump or less)
- They apply to specific areas (usually just ends and mid-lengths)
- They warm it first (distributes more evenly)
- They style immediately after (blow-dry or air-dry to set it)
- They understand their client’s hair type (right oil for the texture)
When you apply these professional principles, you get salon-quality results without the salon price tag.
If your hair still feels dry after oiling, learn why your hair looks dry even after oiling.
The South Asian Perspective on Oil
Coconut oil and sesame oil are fundamental to South Asian hair care—and they work beautifully when applied correctly. These traditional oils are thicker than Western oils, but that’s appropriate for the typically thicker hair of South Asian women.
However, the greasiness problem often comes from quantity, not the oil itself. Apply 3-4 drops of coconut oil correctly to damp thick hair, and you get gorgeous conditioning without greasy hair. Apply half a cup? Now you have a problem.
If you’re creating a haircare routine specifically suited to South Asian hair, consider:
- Using coconut oil 1-2 times weekly, not daily
- Combining it with lighter oils on alternate weeks
- Always applying to damp hair, not dry
- Always washing thoroughly to prevent buildup
Your Step-by-Step Action Plan
This week:
- Count how many drops of oil you currently use (most people are shocked—it’s usually 15-20 drops instead of 3-5)
- Reduce by 50-75%
- Warm oil in your palms first
- Apply to damp hair only
- Focus on mid-lengths to ends
- Style as normal
Next week: If your hair looks better but isn’t shiny enough, increase to 1 drop more. You’re finding YOUR sweet spot, which depends on hair thickness, texture, and porosity.
Ongoing:
- Oil 1-3 times weekly (not daily)
- Alternate between different oils if possible (prevents buildup)
- Use lightweight oils in summer, heavier oils in winter
- Always comb through with fingers to distribute evenly
Your routine should also change with the seasons. Read: How to Keep Hair Fresh in Summer
If your hair becomes frizzy overnight, read how to sleep with frizzy hair.
How to Know You’re Using Oil Correctly
✓ Hair looks shinier, not slicked down
✓ Hair feels softer, not greasy
✓ You can style normally after applying (blow-dry, air-dry, curl)
✓ Hair looks good the next day without re-washing
✓ Ends feel nourished while roots stay light
✓ Scalp doesn’t feel coated or waxy
If you’re checking all these boxes, you’ve mastered the right technique. If not, adjust the amount, not the approach.
Troubleshooting: Why You Still Look Greasy
Problem: Hair looks greasy immediately after applying oil
Solution: You’re using too much. Cut your amount in half. Seriously—most people don’t realize how little is actually needed.
Problem: Hair looks greasy by the next morning
Solution: You’re applying to roots/scalp. Oil belongs on mid-lengths and ends only. Never apply to scalp or first 2-3 inches from roots.
Problem: Scalp feels coated and waxy
Solution: You might have product buildup. Use a clarifying shampoo, then restart with half your usual amount.
Problem: Hair still looks dull despite oiling
Solution: You might have undiagnosed frizz or moisture issues. Oil addresses greasiness and shine, but if your hair has deeper dryness, you need the moisture-first method (water-based hydration before oil).
That’s where this routine helps, read Haircare Mistakes That Cause Frizz
Key Takeaways
- ✓ Use 1-3 drops maximum. Most people use 10x too much.
- ✓ Warm oil in your palms before applying. This distributes it evenly without visible clumping.
- ✓ Apply to damp hair, mid-lengths to ends only. Never apply to scalp or roots.
- ✓ Choose the right oil weight for your hair. Fine hair needs lightweight oils; thick hair can use heavier oils.
- ✓ Oil once weekly, not daily. Daily application causes buildup.
- ✓ Apply before styling. Oil acts as heat protectant and sets better when your hair is styled.
- ✓ Even oily scalps can benefit from oil—if applied correctly. The secret is location and quantity.
If you live in high humidity, learn How to Stop Hair from Puffing Up in Humidity with the right product combinations.
Your Next Steps
- This week: Cut your oil amount in half from what you’re currently using
- Practice the warming technique: Warm in palms, apply mid-lengths to ends
- Track results: After 3 applications, assess whether your hair looks better or greasier
- Adjust as needed: If still too greasy, cut amount again. If not shiny enough, increase slightly
Once you nail the “less is more” principle, you’ll finally understand why oil is a non-negotiable part of professional hair care—without the greasy aftermath.
This guide is part of our complete Haircare Routine for Frizzy Hair in Humid Weather guide.