
Q: How do you style permed hair to keep curls looking their best?
Style permed hair using these three core steps: First, wash with sulfate-free shampoo and apply leave-in conditioner while damp. Second, dry using a diffuser attachment on low-to-medium heat, holding it 6 inches above your hair with gentle scrunching motions to define curls. Third, apply curl-defining mousse or gel to damp sections and either air-dry or diffuse further for added volume and shine. For ongoing maintenance, trim every 6–8 weeks to prevent split ends, avoid washing for 48–72 hours after a perm, and sleep on your side to preserve curl patterns. This combination keeps perms looking fresh and prevents frizz for 3–6 months.
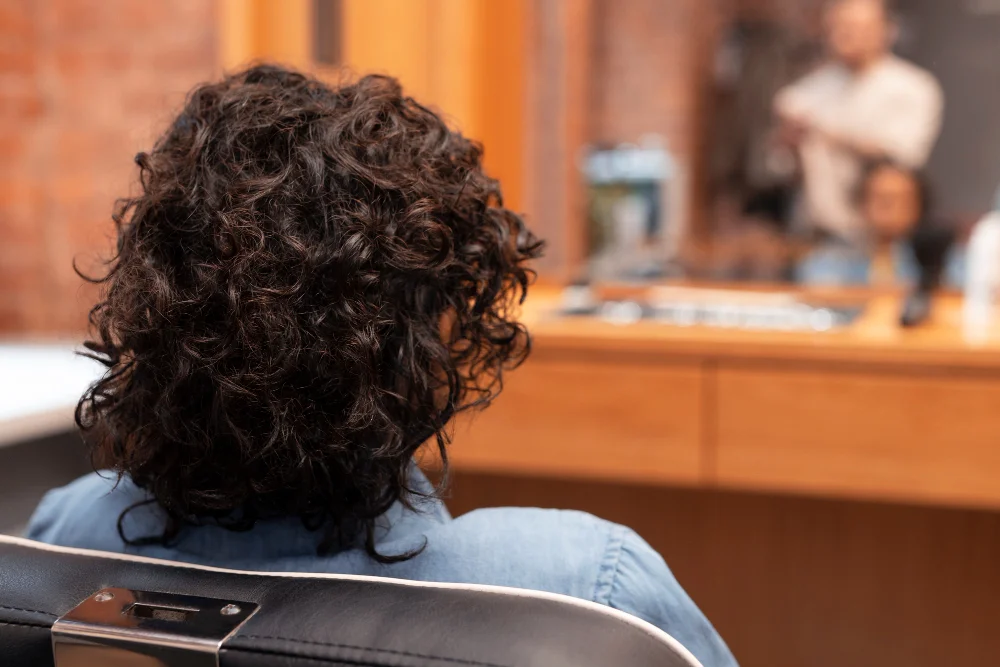
HOW TO STYLE PERMED HAIR, The Real Truth
The moment you step out of the salon with fresh curls, the real work begins. Permed hair isn’t just curly hair—it’s chemically treated hair that needs a completely different playbook than your natural texture.
Here’s the truth: most people don’t fail their perms because they lack talent. They fail because they don’t know what “special care” actually means in practical terms. No more guessing. This guide walks you through exactly how to style, maintain, and keep your perm looking effortlessly stunning for the full 3–6 months it should last.
THE FIRST 48–72 HOURS: THE CRITICAL WINDOW
This is non-negotiable. Your perm is still setting.
According to hair professionals at All Things Hair, when you get a perm, the chemicals used continue to form new bonds in your hair for 2–3 days after the service. This is why the rules are strict during this window:
Do Not Wash Your Hair Washing before 48–72 hours interrupts the bond-reforming process. Your curls can relax or fall out entirely. Even if your scalp feels oily, use dry shampoo at the roots instead.
Skip Heat Tools Completely No blow dryers, flat irons, or curling wands. Heat accelerates water loss from your hair at exactly the moment those new bonds need stability.
Avoid Tight Hairstyles Tight ponytails, braids, and even sleeping on your back can disturb the curl pattern. Wear loose styles or sleep on your side with a silk pillowcase to reduce friction.
Steer Clear of Water Activities Chlorine and saltwater are harsh on newly treated hair. Wait at least 3 days before swimming.
This 72-hour window is the investment period. Follow it strictly, and your perm will hold definition and bounce for months. Skip it, and you’re wasting the service.
WASHING: THE FOUNDATION OF HEALTHY PERMED HAIR
After the initial 3-day window, how you wash becomes everything.
Use Sulfate-Free Shampoo and Conditioner
Standard shampoos contain sulfates that strip natural oils from your hair. For permed hair, these natural oils are essential—they’re what keep your curls moisturized and shiny.
Research from hair care specialists emphasizes that sulfate-free, moisturizing formulas specifically designed for chemically treated or curly hair prevent frizz, reduce breakage, and extend perm longevity. Look for products labeled “curl-safe” or “for chemically treated hair.”
Wash Frequency Matters
Wash permed hair once every 2–3 days, not daily. Frequent washing depletes moisture and causes frizz. If your scalp feels oily between washes, dry shampoo is your friend—it absorbs oil without disrupting your curls.
Conditioning is Non-Negotiable
Every single wash should include conditioner. Apply it to the mid-lengths and ends, not the roots. Deep condition (mask for 20–30 minutes) at least once weekly. This is where most people go wrong—they skimp on conditioning and wonder why their curls feel straw-like.
DRYING: THE TECHNIQUE THAT DEFINES YOUR CURLS
How you dry permed hair determines whether you get defined, bouncy curls or frizzy, limp waves.
The Diffuser Attachment Method (Best Results)
A diffuser is a blow dryer attachment with a bowl shape and small cones. Its job: disperse airflow evenly instead of blasting direct heat onto your curls.
When you use a diffuser, the heat is distributed gently across your entire curl pattern. This prevents the cuticle from being roughened up (which causes frizz) and keeps your curls intact while drying.
Step-by-Step Diffusing Technique:
- Prep: After washing, gently squeeze water from your hair using a microfiber towel or cotton t-shirt. Do not rub.
- Apply Product: While your hair is still damp, apply curl-defining mousse, gel, or cream to sections. These products add structure and hold without crunch.
- Position Your Head: Flip your head forward slightly to direct the diffuser toward your roots first.
- Diffuse with Scrunching Motion: Place sections of wet curls into the diffuser bowl. Use a gentle scrunching motion (cupping your hands upward) rather than combing or brushing. This shapes the curls as they dry.
- Low-to-Medium Heat, Always: High heat creates frizz and can weaken permed hair. Use medium heat at most, and move to cool air once your curls are 80% dry.
- Distance Matters: Hold the diffuser 6 inches away from your scalp for maximum curl definition. Closer = more heat concentration; farther = more volume.
- Hover, Don’t Press: Let the diffuser do the work. Don’t press it against your scalp, which can disrupt curl formation.
The result? Defined, frizz-free curls with natural-looking bounce. Even 15 minutes of diffusing can cut drying time from hours to 20–30 minutes.
Air-Drying Alternative
If you prefer zero heat, air-dry your permed hair using the “plopping” method: wrap damp hair in a microfiber towel or cotton t-shirt for 15–20 minutes, then unwrap and let it finish air-drying. This minimizes frizz while allowing your curl pattern to set naturally.
STYLING PRODUCTS: WHAT WORKS, WHAT DOESN’T
Product choice makes or breaks your styling routine.
Curl-Defining Mousse Mousse provides structure and lightweight hold without weighing curls down. Apply to damp roots and mid-lengths. It hydrates while it holds—exactly what permed hair needs.
Curl Creams and Gels These add definition and frizz control. Apply to soaking-wet hair before drying for maximum effectiveness. Gel creates more hold; cream creates softer, more natural-looking curls. Choose based on your desired finish.
Leave-In Conditioner This is the secret weapon. Apply to damp hair after washing. It reduces frizz, adds shine, and keeps your curls soft and manageable throughout the day.
Serums and Oils A light serum or curl oil applied to dry hair adds shine and combats frizz. Use sparingly—a little goes a long way. Apply to the mid-lengths and ends, never the roots.
What to Avoid
- Heavy silicones that build up and weigh curls down
- Alcohol-based products that dry out hair
- Heat protectants with heavy ingredients (your diffuser doesn’t need them)
- Hairspray near the scalp (it can cause buildup and flattening)
Read Also: Best Natural Moisturiser for Natural Hair (A Practical, Evidence‑Led Guide)
MAINTAINING CURL DEFINITION BETWEEN WASHES
Your curls won’t look fresh on day 3 without a refresh strategy.
The Refresh Spray Method Lightly mist your curls with a water spray bottle in the morning. Scrunch gently with your hands or apply a small amount of mousse to re-activate the curls. The water rehydrates the products from the previous wash day and refreshes the curl pattern.
Sea Salt Spray for Texture For a more textured, beachy wave look, spritz sea salt spray on damp curls and tousle. This works especially well on days 2–3 when your curls need definition boost.
Pineapple Method for Sleeping Before bed, gather your curls loosely at the crown (not a tight ponytail) and secure with a silk scrunchie. This preserves curl shape overnight without the flattening that comes from sleeping on wet curls.
Avoid These Common Mistakes
- Brushing dry curls (it breaks the curl clump and creates frizz)
- Using a regular comb on wet hair (use a wide-tooth comb instead, starting from the ends)
- Touching your curls too much during the day (oils from your fingers flatten them)
HEAT STYLING PERMED HAIR: WHEN AND HOW
Can you use a curling iron or flat iron on permed hair? Yes, but with caution.
After the initial 72-hour window and initial wash, heat tools are safe if used correctly.
Best Practices for Heat Styling:
- Always Use Heat Protectant: Even though your diffuser doesn’t require it, direct heat tools do. Apply a lightweight heat protectant spray to dry sections before using irons.
- Use Medium Heat: 350–375°F is the sweet spot. Higher temperatures can weaken permed hair and cause breakage.
- Curl Iron for Definition: Wrap small sections around a 1–1.5 inch curling iron for 10–15 seconds to add tighter curls or refresh existing ones. Release and let cool in your hand before moving to the next section.
- Flat Iron for Sleekness: A flat iron glided smoothly through sections creates a more polished, straightened look. This works if you want to switch up your style occasionally—but don’t do this frequently, as it strains chemically treated hair.
- Less is More: Use heat styling only 1–2 times per week at most. Your perm should look beautiful without daily heat styling.
TRIM SCHEDULE: THE OVERLOOKED MAINTENANCE GAME-CHANGER
Here’s what most people miss: regular trims are more important for permed hair than for natural hair.
Permed hair is more fragile. Split ends travel faster up the hair shaft in chemically treated hair, and they multiply quickly. A trim every 6–8 weeks (even just half an inch) keeps your curls looking defined, healthy, and bouncy.
Skip trims, and by month 4 of your perm, your ends will look scraggly and frizzy no matter how perfect your styling routine is. The 6–8 week trim schedule isn’t optional—it’s the difference between a perm that looks fresh all the way through and one that looks tired after 2 months.
DEEP CONDITIONING: THE WEEKLY NON-NEGOTIABLE
Your permed hair is chemically processed. It needs moisture like natural hair needs oxygen.
Weekly Deep Conditioning Routine:
- After shampooing, apply a generous amount of nourishing hair mask or deep conditioning treatment to the mid-lengths and ends.
- Leave it on for 20–30 minutes.
- Rinse thoroughly with cool water (cool water seals the cuticle and adds shine).
This is the single most important step for keeping your perms hydrated, defined, and healthy. Skipping this is why people’s perms look dull and frizzy by month 3.
Protein Treatments Once every 2–3 weeks, use a protein treatment. Keratin—a naturally occurring protein in hair—gets broken down during the perm process. Rebuilding it prevents breakage and keeps your curls resilient and shiny. Apply, leave for 10–20 minutes, rinse.
Read Also: What Does Sea Salt Spray Do for Haircare? The Complete Guide to Using It Right
MANAGING FRIZZ: THE DAILY REALITY
Frizz is the enemy of permed hair. It happens because chemically treated hair has an open cuticle structure that absorbs humidity and swells.
Anti-Frizz Strategies:
Choose Humid-Resistant Products: Look for creams and serums that hydrate your curls and give them a smooth, shiny finish. When your curls are well-moisturized, they’re less likely to frizz in humidity.
Protect Against Environmental Stressors: UV rays, dry weather, chlorine, and seawater all dehydrate permed hair. Wear a hat in strong sun, rinse immediately after swimming, and use leave-in conditioner in dry climates.
Seal Your Cuticle: Finish styling with a cool shot from your blow dryer to seal the cuticle. This reduces frizz and adds shine.
Avoid Touching Your Hair: The oils on your fingers smooth the cuticle when intentional (styling) but flatten curls when you’re just touching throughout the day.
SLEEPING POSITIONS AND SILK ACCESSORIES
How you sleep affects your curls more than you realize.
The Right Way to Sleep Sleep on your stomach or side, never on your back. Sleeping on your back puts pressure on your perm, flattening curls at the back of your head.
Silk Pillowcase or Bonnet A silk pillowcase or silk sleep cap reduces friction between your hair and the pillow. Cotton pillowcases create friction that disrupts curls and causes frizz. Silk is a small investment that pays massive dividends for curl longevity.
STYLING IDEAS FOR SPECIAL OCCASIONS
Your perm doesn’t limit you to wash-and-go curls. You have options.
Updo with Cross-Pin Style Perfect for those with tighter curls. Start with clean, dry hair, flip upside down and blow-dry for volume, then cross-pin sections of hair at the back of your head with bobby pins for a glamorous, textured updo.
Twisted Updo with Head Wrap For a polished, sophisticated look: twist small sections of hair and wrap them around the base of a low bun, then secure with pins. Add a silk head wrap for texture and elegance.
Soft Waves with Mousse Apply volumizing mousse to damp roots, diffuse with movement (tilting your head side to side), and finish with cool air for soft, voluminous waves that look effortlessly chic.
Sleek Pulled-Back Style Flat-iron small sections lightly (not fully straightening, just smoothing) and pull your curls into a low ponytail with a silk scrunchie. This creates a polished contrast between the sleekness of the ponytail and texture of the curls.
WHAT NOT TO DO: THE MISTAKES THAT KILL PERMS
Washing Too Frequently Washing daily strips moisture and causes frizz. Stick to 2–3 times weekly.
Using Sulfate Shampoo It’s the quickest way to frizz and dryness. Switch to curl-safe formulas immediately.
Combing Dry Hair Dry curls break and frizz when combed. Always detangle wet hair with a wide-tooth comb, starting from the ends and working up.
Brushing Your Curls Brushes destroy the curl clump and distribute natural oils unevenly. Use your fingers or a comb instead.
Skipping Conditioner Permed hair without conditioner is like a plant without water—it dies slowly. Every wash requires conditioner.
Neglecting Trims Split ends multiply in permed hair. Regular trims keep curls looking defined and healthy. Skip them, and your perm will look tired by month 3.
Using High Heat Blow dryer on high setting and frequent flat-ironing weakens permed hair and causes breakage. Stick to medium heat and diffusers.
Sleeping on Your Back This flattens curls at the back and disrupts the pattern. Side sleeping preserves curl shape.
Read Also: How to Remove Eyebrow Dandruff? A Dermatologist-Approved, Experience-Backed Guide
THE HONEST MAINTENANCE TIMELINE
Week 1: Perfect curls, minimal effort needed. Enjoy the salon freshness.
Week 2–3: Curls still defined. Start weekly deep conditioning. Refresh with water spray as needed.
Week 4: First trim (1/4 inch to keep shape). Curls still bouncy but may need more styling product to maintain definition.
Week 6–8: Second trim. This is the halfway point of your perm’s lifespan. With proper care, curls are still beautiful.
Week 10–12: Third trim. Curls are still defined but starting to relax slightly. More frequent refreshing needed.
Month 4–6: Perm is naturally growing out. As new growth appears, the contrast between permed and natural hair becomes visible. This is normal.
YOUR PERMED HAIR MAINTENANCE CHECKLIST
Print this and stick it to your bathroom mirror:
Daily:
- Sleep on your side with silk pillowcase
- Avoid brushing dry curls
- Refresh curls with water spray if needed
2–3 Times Weekly:
- Wash with sulfate-free shampoo and conditioner
- Apply curl-defining product to damp hair
- Dry with diffuser or air-dry
Weekly:
- Deep condition for 20–30 minutes
- Apply leave-in conditioner
Every 2–3 Weeks:
- Protein treatment (10–20 minutes)
Every 6–8 Weeks:
- Schedule trim appointment (even just 1/2 inch)
Avoid:
- Sulfate shampoo
- Washing hair immediately after perm (wait 48–72 hours)
- Tight hairstyles
- High heat without heat protectant
- Brushing wet or dry curls
- Frequent flat-ironing or straightening
- Chlorine or saltwater in first 3 days
- Sleeping on your back
FINAL WORD: YOUR PERM IS AN INVESTMENT
A perm costs money, takes time to do properly, and requires commitment to maintenance. But the payoff is real: 3–6 months of beautiful, textured curls that give your hair personality and reduce daily styling time once you get the routine down.
The styling techniques in this guide—diffuser drying, deep conditioning, regular trims, curl-safe products—aren’t hard. They’re just different from how you probably treated your hair before. Commit to this routine for 2–3 weeks, and it becomes automatic.
Your curls will thank you with defined, frizz-free shine that makes people ask if your curls are natural. That’s the whole game right there.
Start with the basics: sulfate-free shampoo, diffuser, deep conditioning weekly, and trims every 6–8 weeks. Master those four pillars, and everything else follows.
Your best perm is waiting on the other side of this commitment.
EXPERT SOURCES & CITATIONS
- All Things Hair US: Professional styling recommendations from certified hairstylist Elena Diaz
- Davines Professional Hair Care: Chemical processing and post-perm protocols
- WebMD Beauty: Hair perm safety and care guidelines
- The Curl Story & Living Proof: Diffuser technique best practices and curl formation science
- PATTERN Beauty: Diffuser attachment design and curl definition methodology
Explore more at Blyssn: Different Ways to Style Cowboy Boots for Women